Images make up roughly 50% of the average web page’s total weight. That single fact explains why image optimization is one of the highest-impact SEO improvements you can make — and one of the most frequently overlooked.
Google has made page speed a direct ranking factor, and images are usually the biggest bottleneck. But image SEO goes far beyond compression. Done right, your images can drive significant organic traffic through Google Images, enhance user engagement, and improve your Core Web Vitals scores — all at once.
This guide covers everything you need to know, from choosing the right file format to writing effective alt text.
Why Image Optimization Matters for SEO
Let’s set the stage with some numbers that illustrate the impact:
- Page speed is a ranking factor. Google confirmed this in 2018 for mobile and has steadily increased its weight through Core Web Vitals.
- Google Images accounts for over 20% of all web searches. Optimized images can appear in image search, the regular SERP image carousel, and Google Discover.
- A 1-second delay in page load time can reduce conversions by 7% and increase bounce rate by 11%.
- Largest Contentful Paint (LCP) — one of the three Core Web Vitals — is frequently determined by a hero image. If that image is unoptimized, your entire page fails the Core Web Vitals assessment.
In short: image optimization directly affects your rankings, traffic, user experience, and revenue.
Choosing the Right Image Format
The first decision — and one of the most impactful — is which file format to use. Each format has strengths:
JPEG
Best for: Photographs and complex images with many colors and gradients.
JPEG uses lossy compression, meaning it discards some visual data to achieve smaller file sizes. At quality settings of 70–85%, the difference is imperceptible to the human eye, but the file size can drop by 60–80%.
When to use: Hero images, product photos, blog post featured images, any photographic content.
When to avoid: Images with text overlays, logos, icons, or graphics with sharp edges — JPEG creates visible artifacts around high-contrast edges.
PNG
Best for: Graphics with transparency, logos, screenshots, images with text.
PNG uses lossless compression, preserving every pixel. This makes it ideal for graphics where precision matters, but file sizes are significantly larger than JPEG for photographic content.
When to use: Logos, icons, screenshots, any image requiring transparency or pixel-perfect edges.
When to avoid: Photographs. A PNG photo can be 5–10x larger than the same image as JPEG.
WebP
Best for: Almost everything. WebP is the modern replacement for both JPEG and PNG.
Developed by Google, WebP provides both lossy and lossless compression that’s 25–35% smaller than equivalent JPEG or PNG files. It supports transparency (like PNG) and animation (like GIF), making it incredibly versatile.
When to use: Every image on your site, with JPEG/PNG fallbacks for older browsers.
Browser support: As of 2025, WebP is supported by over 97% of browsers globally, including Chrome, Firefox, Safari, and Edge.
AVIF
Best for: Maximum compression with high quality.
AVIF is the newest contender, offering 20% smaller files than WebP. However, browser support is still catching up (around 92%), and encoding is significantly slower. It’s worth watching but not essential today.
SVG
Best for: Icons, logos, and simple graphics that need to scale infinitely.
SVG is a vector format — instead of pixels, it describes shapes mathematically. This means SVGs are perfectly crisp at any resolution and typically tiny in file size.
When to use: Icons, logos, decorative graphics, charts, diagrams.
When to avoid: Photographs or complex visuals (SVG can’t handle these efficiently).
How to Compress Images Effectively
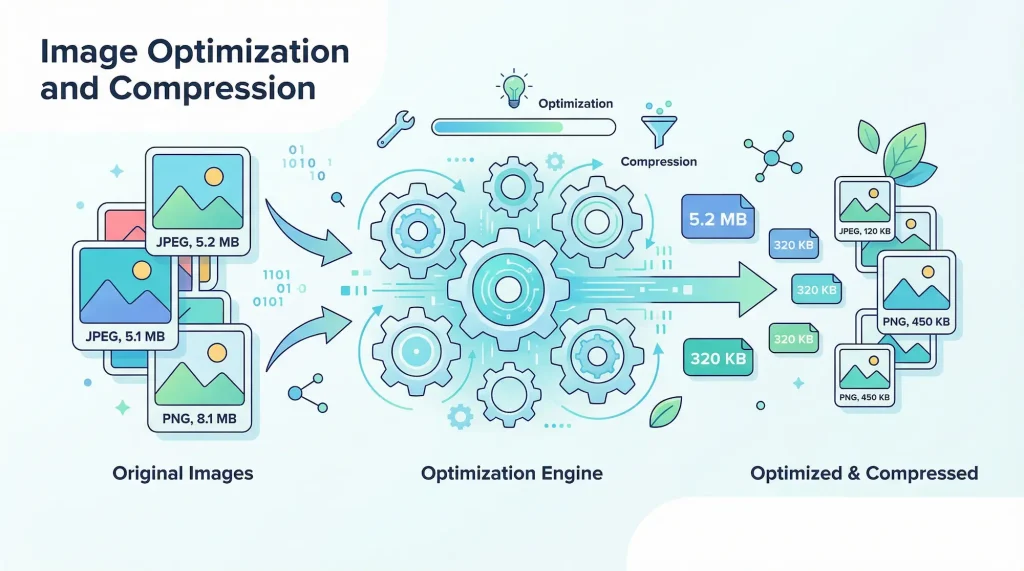
Compression is where the biggest gains happen. Here’s a systematic approach:
Step 1: Resize Before Compressing
The most common mistake is compressing a 4000×3000px image to display it at 800×450px. The browser still downloads the full-size file — you’re wasting 90% of the bandwidth.
Rule of thumb: Resize images to the maximum display size they’ll need. For a blog with a 780px content width, hero images should be 1560px wide (2x for retina displays) at most.
Step 2: Compress the Right Amount
For JPEG, the sweet spot is typically 70–85% quality. Below 70%, artifacts become noticeable. Above 85%, file size increases sharply with minimal quality gain.
For PNG, tools can remove unnecessary metadata and optimize compression algorithms without any quality loss.
Step 3: Convert to Modern Formats
If you’re still serving JPEG and PNG exclusively, converting to WebP can reduce file sizes by 25–35% with identical visual quality.
The best approach is to serve WebP to browsers that support it and fall back to JPEG/PNG for those that don’t. In HTML, use the <picture> element:
<picture>
  <source srcset="hero.webp" type="image/webp">
  <img src="hero.jpg" alt="Description of the image">
</picture>Step 4: Verify Your Savings
After compressing, compare the before and after. Good compression should achieve at least a 50% file size reduction for JPEG photos. If you’re seeing less than 30%, you may need to adjust your settings.
Writing Effective Alt Text
Alt text (alternative text) serves three purposes:
- Accessibility — Screen readers announce alt text to visually impaired users.
- SEO — Google uses alt text to understand image content and context.
- Fallback — When images fail to load, alt text appears in place of the image.
Alt Text Best Practices
Be descriptive and specific.
- Bad:
alt="image" - Bad:
alt="photo" - Good:
alt="Golden retriever puppy sitting in autumn leaves" - Good:
alt="Dashboard showing monthly revenue chart with 23% growth"
Include keywords naturally. If your page targets “chocolate chip cookie recipe,” your alt text might be alt="Fresh chocolate chip cookies cooling on a wire rack". The keyword appears naturally without forcing it.
Don’t start with “Image of” or “Photo of.” Screen readers already announce it as an image. Starting with these phrases is redundant.
Keep it under 125 characters. Some screen readers truncate alt text beyond this length.
Leave decorative images empty. If an image is purely decorative (a background pattern, a divider line), use an empty alt attribute: alt="". This tells screen readers to skip it.
Alt Text for Different Image Types
- Product photos: Describe the product, color, and context.
alt="Navy blue slim-fit cotton t-shirt on wooden hanger" - Infographics: Summarize the key takeaway.
alt="Infographic: 5 steps to improve website loading speed" - Charts/graphs: Describe the trend or data point.
alt="Line chart showing 40% increase in organic traffic from March to September 2025" - Screenshots: Describe what the screen shows.
alt="WordPress dashboard with Yoast SEO plugin settings panel open"
Image File Naming for SEO
Google extracts meaning from file names. A descriptive file name helps search engines understand the image content before even looking at the alt text.
Bad: IMG_20250315_001.jpg, screenshot-2.png, photo.jpg
Good: chocolate-chip-cookie-recipe.jpg, react-component-lifecycle-diagram.svg, tokyo-skyline-sunset.webp
Guidelines:
- Use lowercase letters
- Separate words with hyphens (not underscores)
- Be descriptive but concise
- Include relevant keywords naturally
- No special characters or spaces
Responsive Images with srcset
Different devices need different image sizes. A 4K desktop monitor and a smartphone shouldn’t download the same file. The srcset attribute solves this:
<img
  src="hero-800.jpg"
  srcset="
    hero-400.jpg 400w,
    hero-800.jpg 800w,
    hero-1200.jpg 1200w,
    hero-1600.jpg 1600w
  "
  sizes="(max-width: 768px) 100vw, 800px"
  alt="Team brainstorming in a modern office"
>
The browser automatically selects the most appropriate size based on the viewport and device pixel ratio. This alone can reduce image data transfer by 30–50% on mobile devices.
Lazy Loading
Lazy loading defers the loading of off-screen images until the user scrolls near them. This dramatically improves initial page load time, especially on image-heavy pages.
Modern browsers support native lazy loading with a single attribute:
<img src="photo.jpg" alt="Description" loading="lazy">Important: Don’t lazy-load your LCP image (usually the hero or first visible image). It needs to load immediately. Only apply lazy loading to images below the fold.
In WordPress, lazy loading is applied by default since version 5.5. For your hero image, explicitly add loading="eager" or use fetchpriority="high" to ensure it loads first:
<img src="hero.jpg" alt="Description" loading="eager" fetchpriority="high">Core Web Vitals and Images
Google’s Core Web Vitals directly measure user experience, and images affect two of the three metrics:
Largest Contentful Paint (LCP)
LCP measures how long it takes for the largest visible content element to render. In most cases, this is the hero image.
Target: Under 2.5 seconds.
How to optimize for LCP:
- Compress your hero image aggressively (aim for under 200KB)
- Use
fetchpriority="high"on the LCP image - Preload the LCP image:
- Serve from a CDN
- Use modern formats (WebP/AVIF)
Cumulative Layout Shift (CLS)
CLS measures unexpected layout shifts. Images without explicit dimensions cause shifts because the browser doesn’t know how much space to reserve until the image loads.
Target: Under 0.1.
How to fix: Always include `width` and `height` attributes on your `<img>` tags:
<img src="photo.jpg" alt="Description" width="800" height="450">CSS `aspect-ratio` is another modern approach:
img { aspect-ratio: 16 / 9; width: 100%; height: auto; }
Image Sitemaps
If images are important to your site (e-commerce, photography, recipes), an image sitemap helps Google discover and index them more effectively.
You can extend your existing XML sitemap:
<url>
  <loc>https://example.com/blog/post-title/</loc>
  <image:image>
    <image:loc>https://example.com/images/hero.webp</image:loc>
    <image:title>Descriptive title</image:title>
  </image:image>
</url>
Most SEO plugins (Yoast, Rank Math, All in One SEO) handle this automatically in WordPress.
Structured Data for Images
Adding structured data helps Google display your images as rich results. For articles, the `Article` schema includes an `image` property:
{
  "@context": "https://schema.org",
  "@type": "Article",
  "headline": "How to Optimize Images for SEO",
  "image": "https://example.com/images/image-seo-guide.webp"
}
For product pages, recipe pages, and how-to articles, structured data with images can earn featured snippets and rich results in search.
A Quick Image SEO Checklist
Before publishing any page, run through this checklist:
- Are images resized to their maximum display dimensions?
- Are images compressed (JPEG at 70–85%, PNG optimized)?
- Are images served in WebP format (with fallbacks)?
- Does every meaningful image have descriptive, keyword-rich alt text?
- Are file names descriptive and hyphen-separated?
- Is the hero/LCP image preloaded and prioritized?
- Are below-the-fold images lazy loaded?
- Do all images have explicit width and height attributes?
- Is the total page weight under 1.5MB?
- Does the page pass Core Web Vitals in PageSpeed Insights?
Conclusion
Image SEO is one of the highest-ROI optimizations you can make. The steps are straightforward — choose the right format, compress effectively, write good alt text, and implement modern loading techniques. Each step individually makes a small difference; together, they can transform your page speed, search visibility, and user experience.
The best time to start optimizing your images was yesterday. The second best time is right now.